Concert photography has always been a cherished dream for many photographers. However, obtaining official accreditation is a complex and not always accessible process. Fortunately, even without that coveted pass, it’s possible to capture impressive shots if you know the rules of the game. The portal bur4ik.ru has prepared a comprehensive guide on how to shoot live performances as effectively and safely as possible while remaining an ordinary spectator.
How to Get into a Concert Without Accreditation and Not Get Kicked Out: Legal Aspects and Etiquette
Photographing at public events is always a balance between your desire to capture the moment and the rights of organizers, artists, and other attendees. It’s important to understand the legal framework to avoid conflicts and removal from the venue.
The Legal Side of Things
- Copyright and Public Performance: According to Russian law (Article 24 of the Law on Information…), shooting for personal use is generally permitted. However, if you plan to use the photos commercially or publish them widely, you may face claims from organizers or the artist themselves (as the author of the performance).
- Venue Rules: The most important thing is the internal rules of the concert venue. Most clubs and halls strictly prohibit professional photography (especially with tripods and large lenses) without special permission.
- What You Can Shoot: Shooting with a smartphone or a small compact camera (without interchangeable lenses) for your personal archive usually doesn’t cause problems.
- What You Cannot Do: Using a flash (which may be prohibited for safety reasons and can disturb other spectators), setting up tripods or monopods, and attempting to enter restricted areas.
Etiquette and Interacting with Staff
Your success often depends not on the law, but on your ability to communicate. Security guards and ushers are people performing their duties.
- Respect Above All: If you are asked to put your camera away, don’t argue. Polite compliance will allow you to stay at the concert.
- Explain Your Intentions: If you are shooting with a decent camera but just for yourself, you can politely inform the staff: “I just want to take a couple of shots for myself, I won’t use the flash.”
- Don’t Block the View: The most critical rule for a spectator-photographer is not to disturb those who came to enjoy the show, not to watch your screen or camera.
Example Situations and How to Avoid Them
- Situation: You are trying to push closer to the stage, holding your camera above your head. Solution: Stay in your spot unless it’s a dance floor area where more free movement is allowed.
- Situation: A security guard sees you using a large camera. Solution: Immediately put the camera away if asked. Trying to “finish shooting while they’re not looking” will result in removal.
Choosing Equipment: What to Bring to a Concert Without Accreditation (and Not Lose)
Your equipment should be compact, fast, and most importantly, not attract unnecessary attention. You need to be mobile and ready for sudden changes in position.
Cameras: Balancing Quality and Discretion
- Smartphones: Modern flagships handle low light quite well (thanks to computational photography). Ideal for maintaining anonymity.
- Compact Cameras (Point-and-Shoot): Models with good zoom and a large sensor (e.g., Sony RX100) are an excellent compromise. They allow you to shoot from a medium distance but look less “professional” than DSLRs.
- Mirrorless/DSLR Cameras: If you decide on a DSLR, choose the most compact models possible (e.g., Sony A6xxx or Fuji X-series) with a small prime lens.
Lenses: Aperture is Your Best Friend
In concert conditions, light is your main enemy. You need optics that can “gather” as much available light as possible.
- Optimal Focal Lengths: 35mm, 50mm, or 85mm (in full-frame equivalent). They provide a sufficiently close-up view and don’t require extremely low apertures.
- Key Parameter — Aperture: Look for lenses with an f/1.8, f/1.4, or f/2.0 rating. The lower the number, the better. Avoid lenses with apertures of f/4.0 or higher.
- Zoom Lenses: If you take a zoom lens, make sure it’s fast, for example, 24-70mm f/2.8. However, be prepared that at maximum zoom at f/2.8, there will still not be enough light.
Accessories and Safety
It’s easy to lose or damage equipment at a concert. Prepare for this in advance.
- Batteries: Bring at least two fully charged batteries. Shooting at high ISO drains the battery quickly.
- Memory Cards: Be sure to use a fast, but not too expensive, card. If it’s lost or damaged, you won’t lose your annual budget.
- Strap: Use a sturdy strap that can be worn around your neck and secured in front. A safety tether attached to your belt is best (if permitted).
- Cases and Bags: Forget about large photo backpacks. Use a waist bag or a camera hanging around your neck, covered by a jacket. The goal is not to look like a professional who needs to carry a lot of gear.
What to Absolutely Avoid Bringing:
- Tripods, monopods, selfie sticks.
- Large telephoto lenses (they immediately identify you as a photographer).
- External flashes (even if not prohibited, their use is still inappropriate due to etiquette).
Camera Settings for Concert Photography in the Dark: A Quick Start
Concert photography is always a challenge for a camera. The main goal is to get enough light while keeping the artist in focus and freezing motion.
The Three Pillars of Exposure in the Dark
You will be working in aperture priority mode (Av) or manual mode (M), constantly balancing three parameters.
- ISO: Maximum Sensitivity
- High ISO: Don’t be afraid to use ISO 3200, 6400, or even 12800 if your camera allows. Modern noise reduction algorithms handle this well.
- Balance: Find the golden mean. Too high an ISO will result in a lot of noise, but the shot will be “frozen.” Too low an ISO will result in motion blur. Start with ISO 3200 and increase as needed.
- Aperture: Wide Open
- Wide Aperture: Set the lowest possible value (f/1.4, f/1.8, f/2.8). This is necessary to gather all available light and create beautiful bokeh (blurred background), separating the artist from the busy stage.
- Shutter Speed: Freezing Motion
- Optimal Limit: For shooting a vocalist or static moments, try not to go below 1/125 second. If the artist is moving actively (dancing, jumping), aim for 1/200 sec. or faster.
- Compromise: If you are forced to lower the shutter speed to 1/60, be prepared for blurred hands or small movements.
Focusing: Speed is Key
Autofocus needs to be lightning fast. Older autofocus systems can result in blurry images.
- Focus Mode: Use continuous tracking mode (AF-C or Servo AF). The camera will constantly adjust focus as long as you half-press the shutter button.
- Focus Point: Choose a single central focus point. It’s the fastest. Focus on the artist’s eyes.
- Anticipation: Start focusing slightly before the artist reaches the ideal spot.
White Balance (WB)
Stage lighting (blue, red, green) distorts colors if shooting in “Auto” mode.
- Manual Setting: It’s best to set the “Incandescent” or “Fluorescent” preset and adjust it manually while looking at the screen.
- RAW Format: If possible, always shoot in RAW. WB can be perfectly corrected later without quality loss.
Example Settings for Different Scenarios (on an APS-C camera):
- Slow Ballad, Static Pose: ISO 1600, f/2.0, Shutter Speed 1/100.
- Active Rock Concert, Close to the Stage: ISO 6400, f/1.8, Shutter Speed 1/250.
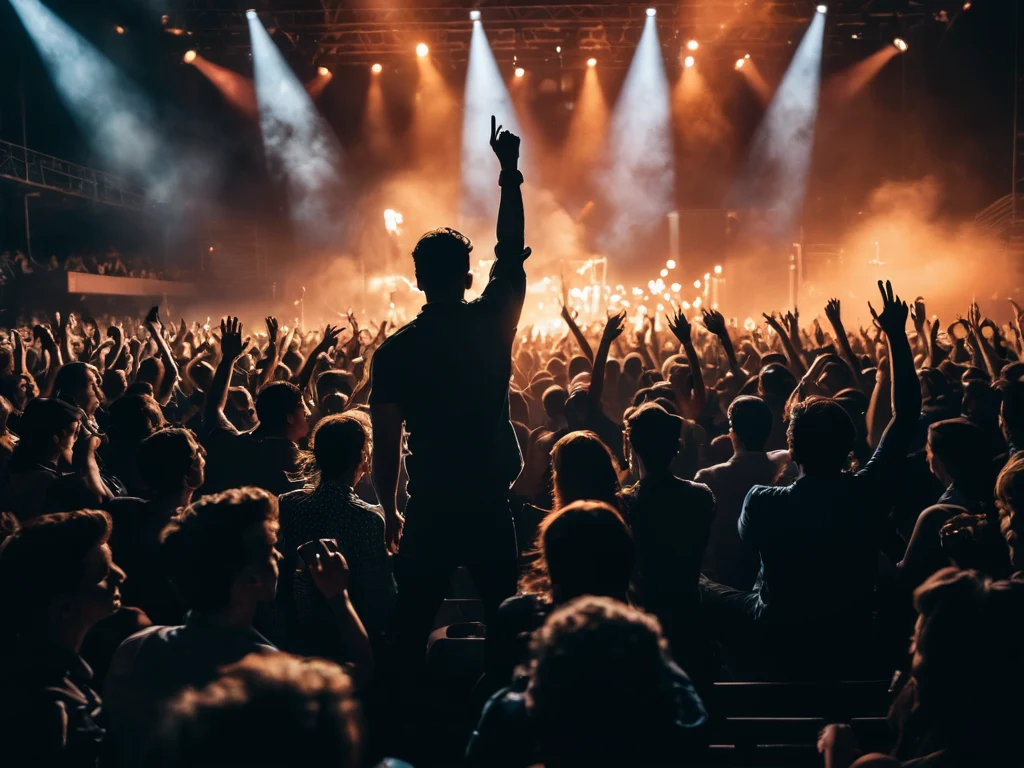
Shooting in a Crowd: Techniques That Will Save Your Shots (and Yourselves)
Being in the thick of the audience is like participating in a mini-battle for the best angle. The main thing is to remain unnoticed and protect your equipment.
Protecting Your Equipment and Yourself
- Protection Against Impacts: Your camera should always be around your neck. If you feel yourself being pushed, press the camera to your body, holding it with one hand. Never wear your camera on a single shoulder strap – it can easily be snatched.
- Protection from Drinks: Avoid standing directly under balconies or near bar counters where drinks might fall. If you are in the middle, try not to open your own drinks to avoid losing control of them.
Hand-Free Shooting Techniques
To react quickly to a changing scene, you need to minimize the time spent manipulating settings.
- Hip-Shooting: If you can’t raise your camera for a shot (e.g., you’re tightly surrounded), hold the camera at waist level. Learn to quickly orient yourself using the screen or viewfinder if it’s positioned at an angle.
- Overhead Shooting: Try holding the camera above the crowd with outstretched arms. This provides a clear shot without heads, but requires constant focus control. Set continuous shooting to increase your chances.
Finding Advantageous Shooting Spots in the Crowd
The best spot isn’t always right in front of the stage. Sometimes, the best shots are taken from the flanks.
- Flanks and Speakers: Try moving slightly to the side, closer to one of the side speakers or screens. This offers a good view of the musicians and you won’t be in the epicenter of the crowd pressure.
- Elevated Spots: If there are balconies, bars, or even just high partitions in the venue, these are ideal spots. They offer a panoramic view, and you won’t be disturbing anyone.
- Changing Position: If you notice that a certain spot has become less crowded (e.g., after the opening act leaves), quickly and discreetly move there.
Shooting Without Disturbing Others
Your goal is not to be intrusive.
- Use Continuous Shooting: Press and hold the shutter button. You will take a burst of 5-10 frames, among which there will surely be one successful, sharp shot with good emotion.
- Watch the Stage, Not the Camera: You should react to what’s happening on stage, not what you see in the viewfinder. Set the main parameters in advance, and then just press the shutter.
Editing Concert Photos: Turning ‘Dark’ Shots into Masterpieces
Raw concert files often look dull: gray shadows, overexposed spotlights, and a dominant blue or green tint. Proper post-processing will bring them back to life.
Working with RAW: The Foundation of Success
If you shot in JPEG, you’ve already limited your options for noise and light correction. RAW files offer full scope for maneuver.
- Recovering Details: Thanks to the wide dynamic range of RAW, you can “pull out” details from deep shadows (e.g., on the artist’s black costume) and “tone down” overly bright spotlights.
- Noise Control: Noise reduction in RAW converters is always more effective than the in-camera built-in option.
Key Editing Stages
It’s best to edit sequentially to avoid overloading the image with artifacts.
- Basic Correction (Exposure and Contrast): First, bring the overall exposure to the desired level. Then, increase the overall contrast. Use the “Shadows” and “Highlights” sliders to control blown-out areas and clipped shadows.
- Color Correction and White Balance: Set the correct WB. After that, work on saturation. At concerts, it’s often better not to increase overall saturation, but to selectively correct bright colors (e.g., red or blue spotlight color).
- Noise Reduction: This is a critical step. Apply noise reduction (Luminance Noise Reduction) very sparingly. Overdoing it will make the photo look “plastic.” Start with a level of 15-20.
- Sharpness and Detail: After noise reduction, sharpness always decreases. Carefully add sharpness (Sharpening). Use masking so that sharpness is applied only to the subjects (artists), not to background noise.
Editing Tools
- Adobe Lightroom/Capture One: Industry standards for batch processing and catalog management.
- Topaz DeNoise AI/DxO PureRAW: If the noise is very strong, specialized AI-based programs will yield results unattainable in standard editors.
Creating Mood
Concert photography should convey energy. Use curves to create S-shaped patterns to deepen shadows and brighten midtones. Add a slight vignette to focus the viewer’s attention on the performer.
How to Share Concert Photos and Not Violate Copyright: Legal Nuances
You’ve taken great shots, but now you face the question of publication. Improper use of someone else’s content can lead to account bans or lawsuits.
Copyright for Concert Photos
Remember: the rights to the shot belong to you as the photographer, but the rights to the artist’s image and their public performance may belong to the organizers or the artist themselves (regarding the use of their likeness).
- Personal Use: Publishing on your personal Instagram page with the tag “for personal archive” is usually safe.
- Commercial Use: If you try to sell the photos or use them to promote your business (even indirectly), you must obtain written permission.
How to Get Permission to Publish
Even if you’re not accredited, sometimes you can reach an agreement.
- Contact the PR Manager: Find the contact information for the band’s PR service or the tour organizer. Politely explain that you’ve taken some great shots and would like to publish them in your portfolio, tagging all official accounts.
- Creative Commons License: If you’re unsure whether you can use the photos freely, consider publishing them under a CC BY-NC license (Attribution-NonCommercial).
Rules for Attribution
Always indicate your authorship, even if you are not seeking permission to publish.
- Standard Signature: Photo: @your_account / bur4ik.ru.
- Respect the Venue: If the venue has clearly stated its rights to broadcast or photographic materials, be sure to credit them.
Avoiding Bans
Social networks are very sensitive to copyright infringement (DMCA Takedowns).
- Do Not Use Music: Never overlay music from the artist’s albums onto videos where you use their photos/videos. This is almost a guaranteed strike.
- Limit the Quantity: Don’t post 50 shots at once. It’s better to post 5-7 best photos with a detailed concert description than a full photo report, which could be considered an attempt at piracy.
Shooting without accreditation is an art of compromise between the desire to get the perfect shot and the need to adhere to safety rules and respect for other concert attendees. Armed with the right equipment and knowledge of etiquette, you can leave the event not only with emotions but also with stunning photographs.