Creating high-quality visual content is always a team effort. The photographer is responsible for lighting and composition, but the final result that the viewer sees largely depends on the retoucher. However, even the most talented specialist cannot read the client’s mind. That is precisely why having a clear, structured, and maximally detailed Technical Specification (TS) is not just a recommendation, but a critically important condition for successful and effective work. Experts at bur4ik.ru have prepared a comprehensive guide to help you create a TS that eliminates any misunderstandings and ensures the final shot fully aligns with your creative vision.
Why a Technical Specification for Photo Retouching is Important: Avoiding Misunderstandings and Saving Time

A TS is the bridge between the client’s vision and the retoucher’s technical execution. The absence of documentation or its incompleteness leads to financial and time losses, as revisions that could have been avoided at the start inevitably arise. Working without a TS is always a gamble.
Benefits of a Clear TS:
- Time Savings: The retoucher immediately understands the scope and complexity of the work, allowing them to accurately estimate deadlines and avoid wasting time guessing preferences.
- Reduced Revisions: If the result meets the criteria outlined in the TS, revisions will be minimal or non-existent.
- Setting Expectations: The TS serves as a legal or, at the very least, a working document that clearly defines exactly what needs to be done for the agreed-upon price.
- Scalability: When working with large batches of images or multiple retouchers, a TS ensures consistency in style and quality.
Key Elements of an Ideal TS for a Retoucher: A Complete Checklist
An ideal TS consists of three key blocks: administrative, technical, and creative. Each block should be filled out as thoroughly as possible.
1. Administrative Block (Project Organization)
- Contact Information: Name, phone number, preferred contact method (Telegram, email).
- Deadlines: Deadline (date and time for delivery of the finished material). It’s important to specify whether this is the deadline for the first draft or the final version.
- Number of Files: The exact number of photographs to be processed.
- Budget and Payment: Cost per image or total amount. Prepayment and post-payment terms.
- Revision Policy: Number of free revision rounds, cost of additional revisions.
- Source Files: Link to cloud storage (Google Drive, Dropbox) with source files. Specify the format (RAW, DNG, TIFF).
2. Technical Block (Format and Technical Requirements)
- Resolution: Required resolution of the final file (e.g., 300 dpi for print or 72 dpi for web).
- Size: Specify dimensions in pixels or centimeters (e.g., 2048px on the long edge).
- Color Space: Be sure to specify: sRGB (for web), Adobe RGB, or CMYK (for print).
- Delivery Format: JPEG (with compression quality specified), TIFF, PSD (if layers need to be preserved).
- File Naming: Is renaming of files required? If so, according to what template (e.g.,
sku_model_01.jpg).
3. Creative Block (Style and Preferences)
This is the most crucial section, requiring the most detail and the use of references.
- Overall Style: (e.g., “natural magazine retouching,” “high gloss,” “warm Instagram look”).
- Presets: Should a specific preset or film emulation be used?
- Retouching Depth: (See the next section).
Detailing Retouching Tasks: What Specifically Needs to Be Specified?
You cannot simply write “make it beautiful.” The retouching process needs to be broken down into specific, measurable tasks. Experts recommend using a marking or numbering system for each type of processing.
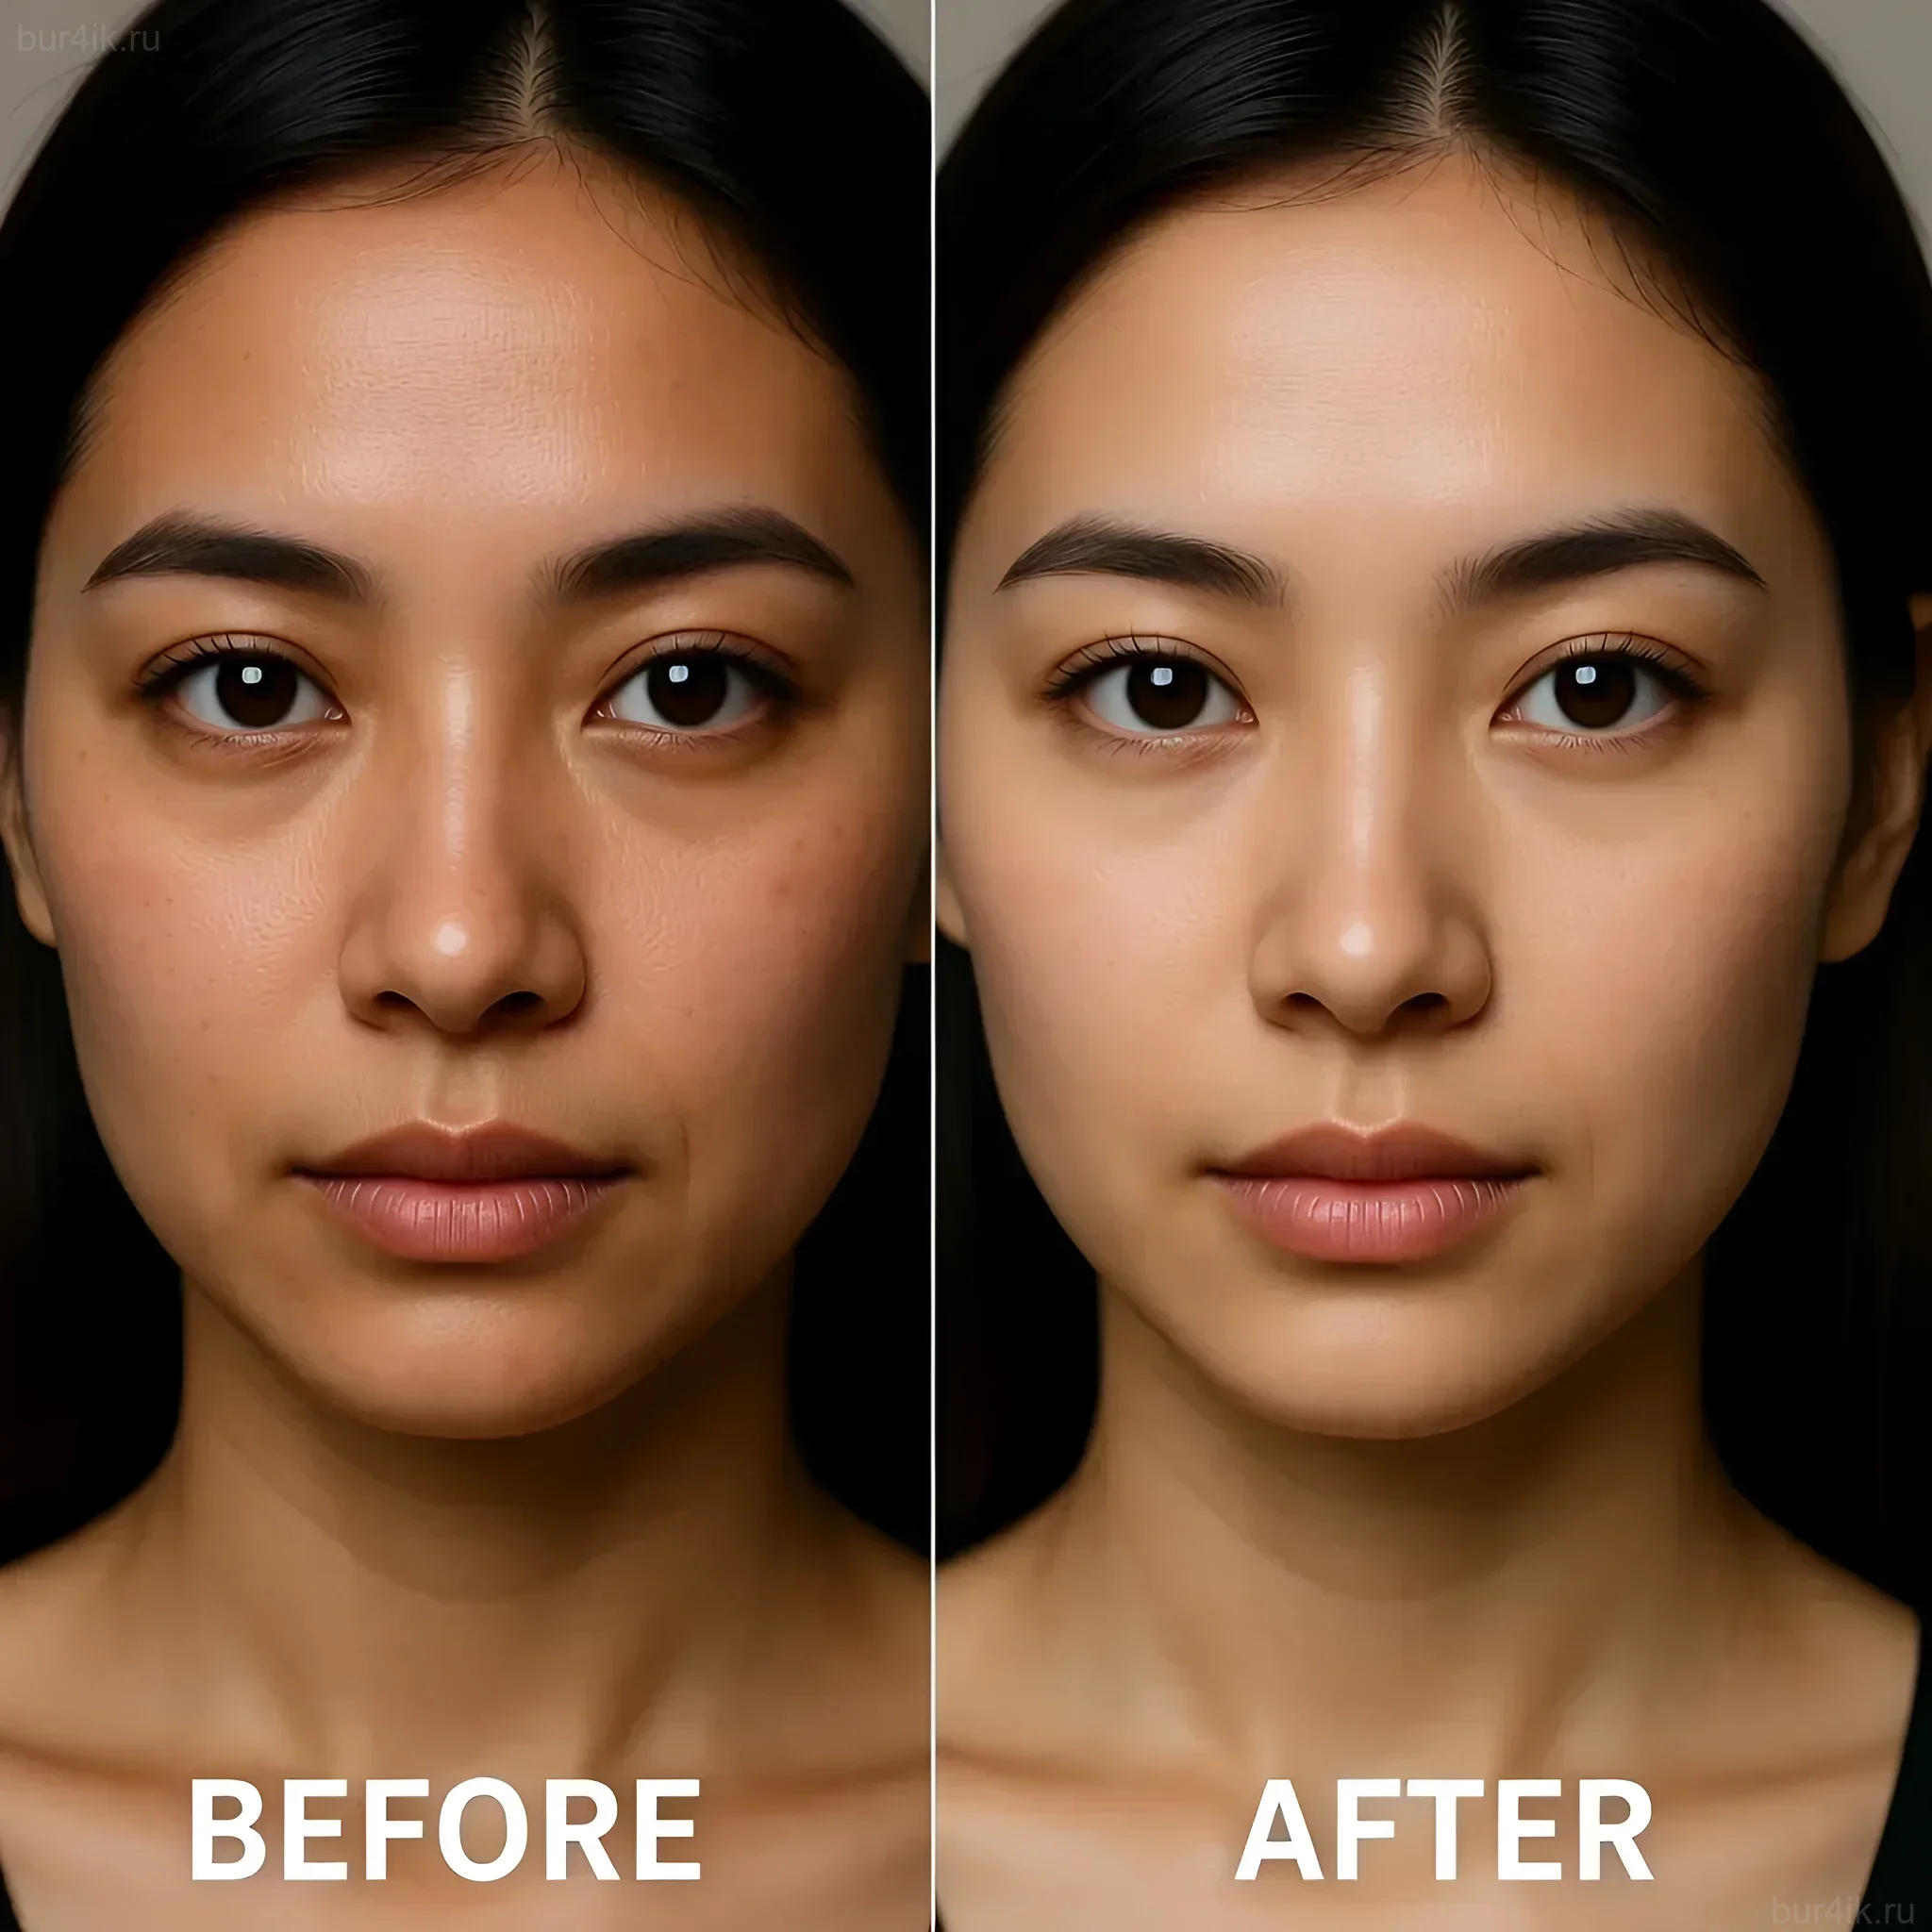
1. Skin Retouching
This is the most common point of contention. The level of intervention needs to be defined as clearly as possible.
- Level of Retouching:
- Minimal (Natural): Removal of only temporary blemishes (pimples, scratches, dark circles under the eyes), preservation of skin texture (pores).
- Medium (Beauty/Commercial): Removal of all blemishes, slight tone equalization, minimal texture smoothing (frequency separation).
- Maximum (Glamorous/Magazine): Aggressive equalization, significant texture smoothing, often using the Dodge & Burn technique for sculpting volume.
- Specific Requirements: Specify whether moles, freckles, or scars should be preserved.
- Hair: Should stray hairs be removed, and should eyebrows/eyelashes be enhanced?
2. Color and Tone Adjustment (Color Grading)
Color is the emotional background of an image. Subjective perception cannot be relied upon.
- White Balance: Should it be neutral or have a warm/cool tint?
- Contrast: High, medium, low. Is a “darkened” or “bleached” look desired (matte effect).
- Color Palette: Emphasize specific colors (e.g., “enhance blues and yellows,” “mute reds”).
- Histogram: Should shadows be completely black or retain detail?
3. Geometry and Liquify (Liquify & Reshaping)
In commercial and portrait retouching, shape correction is often required. This must be explicitly stated.
- Model’s Physique: Specify what exactly needs to be corrected (e.g., “remove the crease in the clothing,” “slightly slim the waist,” “straighten the horizon line”).
- Lens Distortion: Is mandatory correction of distortion required (especially important for architecture and product photography).
- Alignment: Check verticals and horizontals.
4. Background and Object Retouching
- Object Removal: List what needs to be removed (outlets, wires, logos, debris on the floor).
- Background Replacement: If replacement is required, provide the source file with the desired background or a clear description.
- Cleaning: Removal of dust and stains from clothing, shoes, and surfaces.
Tip: For each frame requiring specific liquify adjustments or complex object removal, it is recommended to create a separate screenshot with annotations.
References and Examples: How to Show the Retoucher What You Want
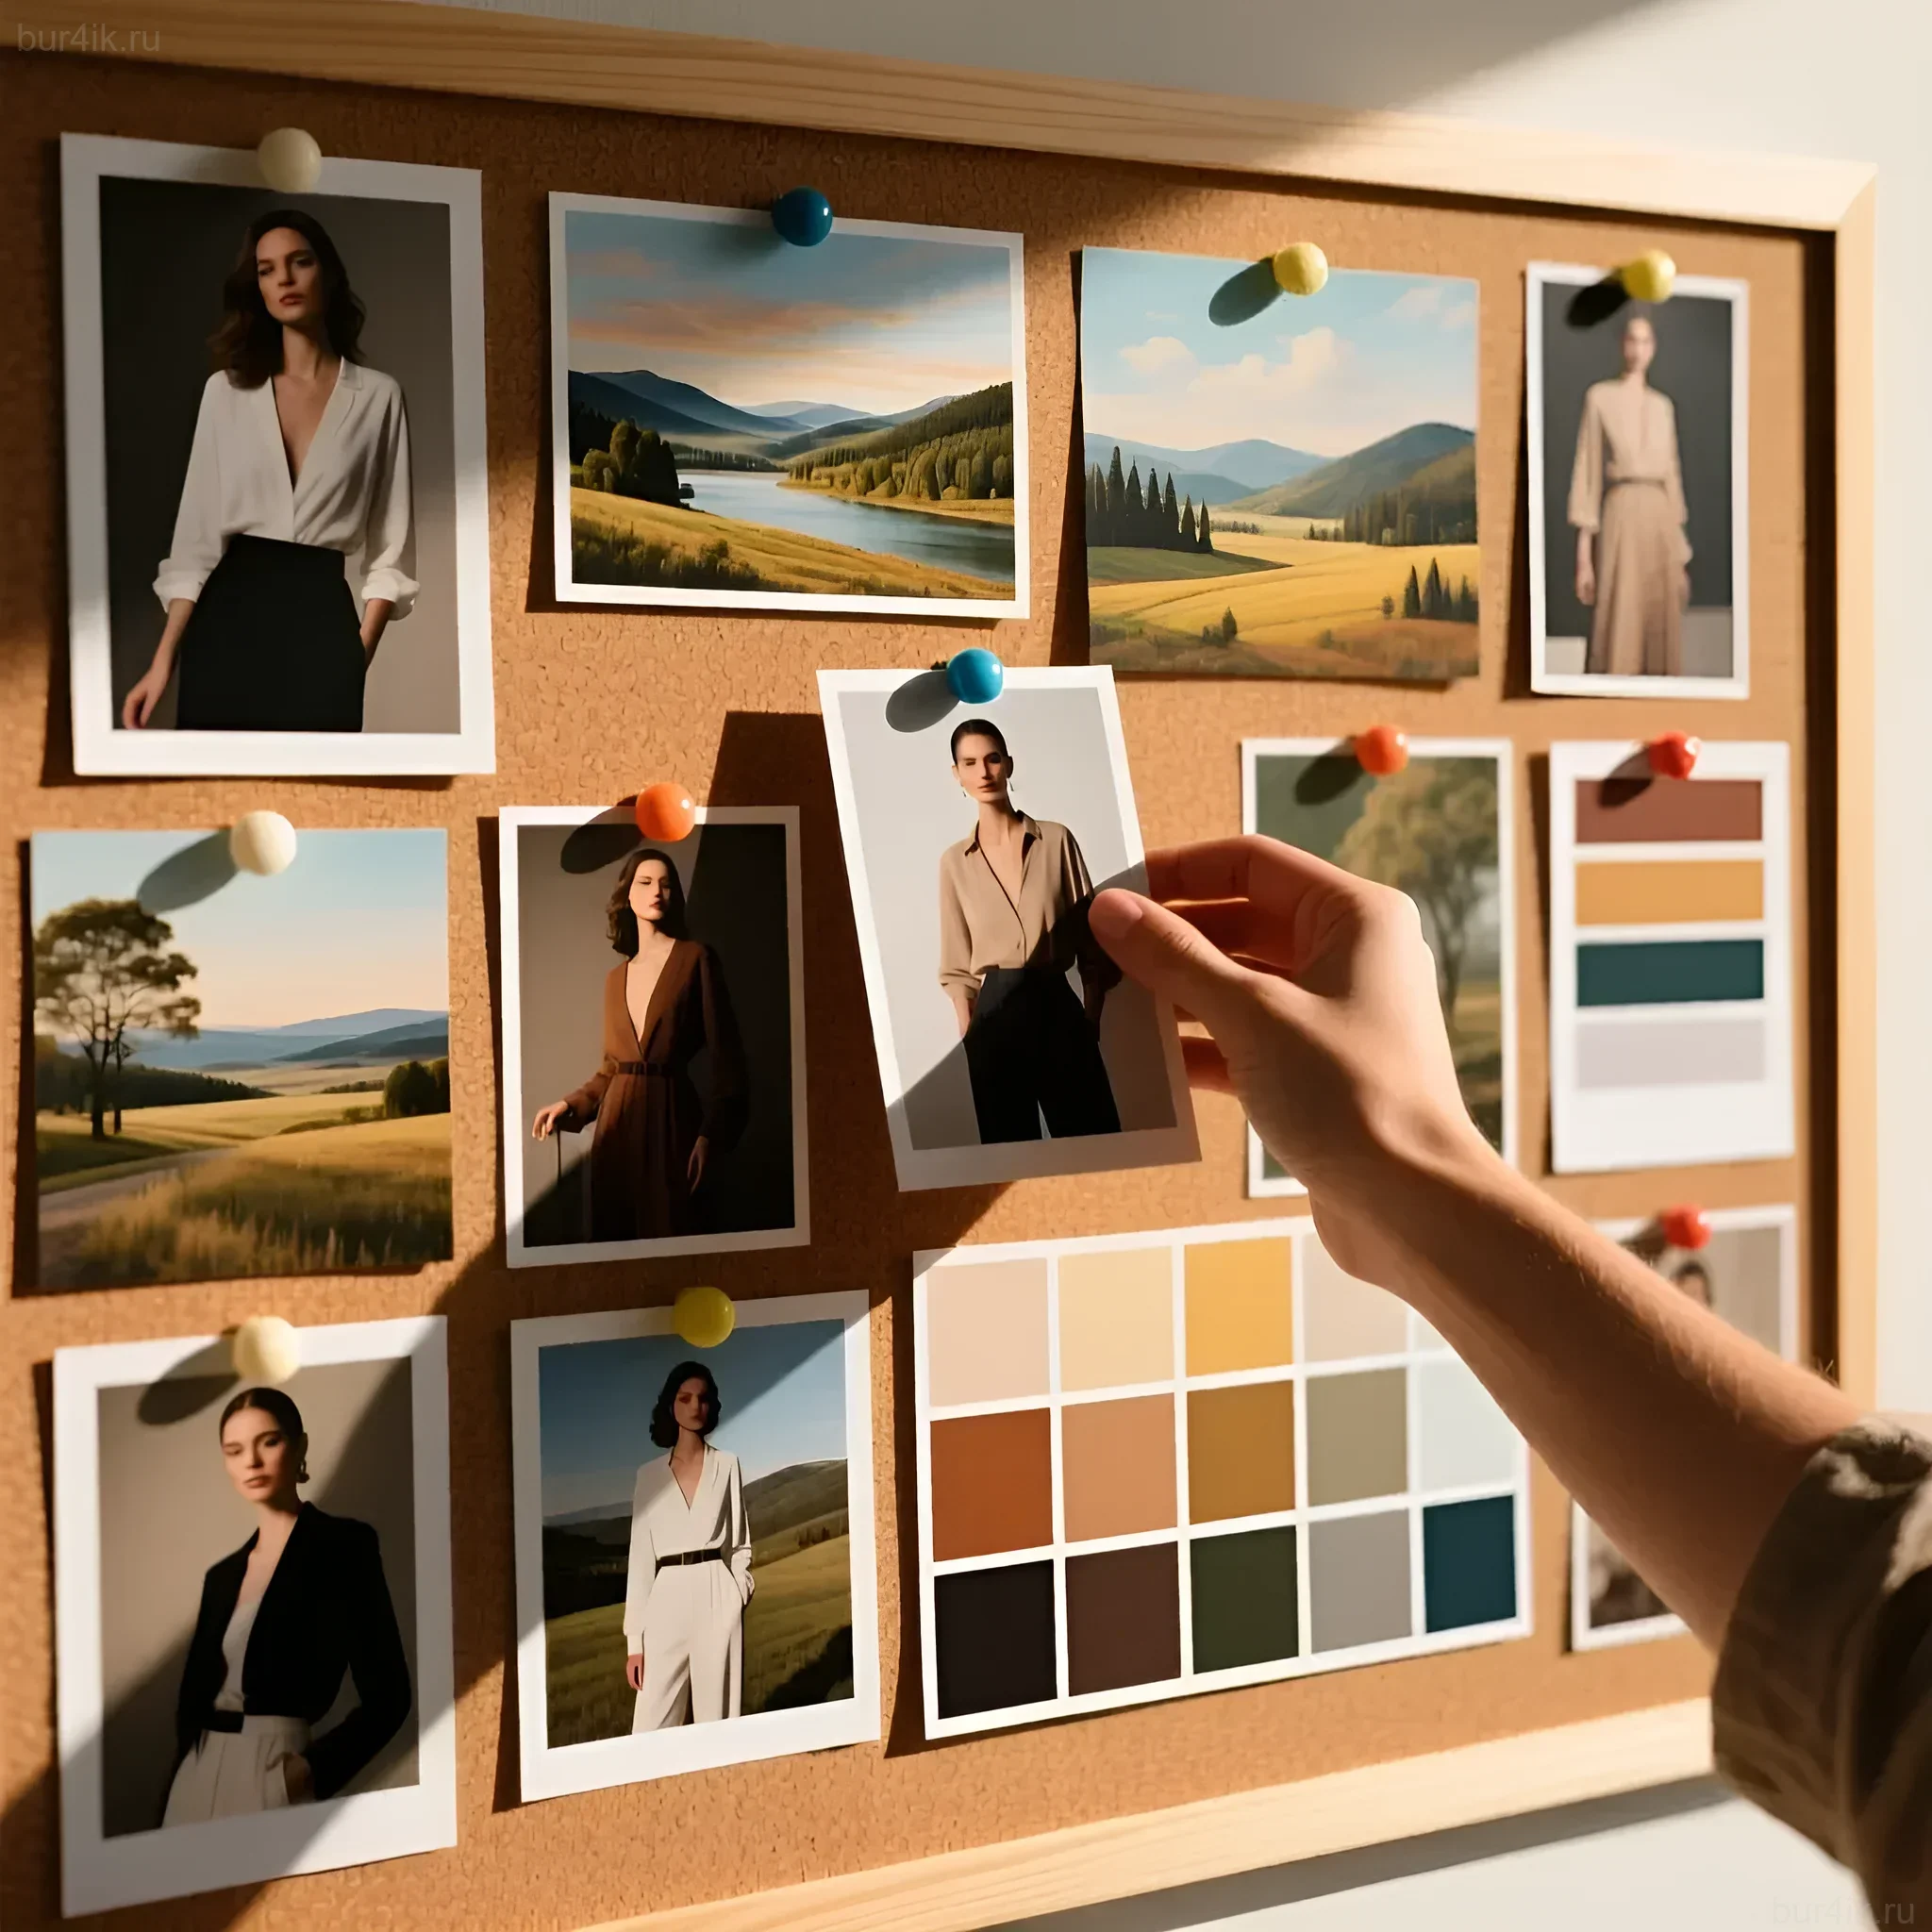
Words can be interpreted differently, but visual examples are a universal language. References are the most powerful tool in a TS.
Using “Good” and “Bad” Examples
Professionals advise using not only examples of how it should be but also how not to do it.
- Reference A (Goal): Attach 3–5 photos that perfectly reflect the desired retouching style (color, contrast, skin texture). Be sure to specify what exactly you like about these references (e.g., “I like how the skin texture is preserved and the color is soft yet clean.”).
- Reference B (Stop List): Show 1–2 photos whose processing you absolutely dislike. Explain the reason (e.g., “The plastic skin effect is unacceptable” or “Too aggressive red saturation.”).
Annotating Source Files
For complex tasks or individual edits on specific images, use annotations.
- Screenshots with Annotations: Open the source file in any graphics editor (even Paint or the standard Windows/MacOS editor), circle the problematic areas in red, and add an arrow with a comment (e.g., “Remove this shadow”, “Brighten the eyes”).
- Batch Processing: If 90% of the images require the same processing and 10% require individual attention, separate them into folders: “Group A (Standard Retouching)” and “Group B (Special Tasks)”.
TS Format: Template and Tools for Convenience

The TS should be easy to read. A long, solid block of text in an email body is a mistake. Use structured documents.
Recommended Tools for Creating a TS
- Google Docs / Microsoft Word: Ideal for structured text, lists, and formatting. Easy to share and edit.
- Google Sheets / Excel: Excellent for batch processing where each image has its unique requirements. Use a table with columns:
File #,Skin Task,Background Task,Comments. - Trello / Asana: For large projects. Each frame or group of frames can be a separate “card” with a checklist and attached references.
- PDF File: A final, unchangeable document that is attached to the contract.
TS Template Structure
Experts recommend the following order of sections so that the retoucher can quickly find the necessary information:
- General project information (Title, deadlines, contacts).
- Technical requirements (Format, resolution, color space).
- Overall retouching style (Color correction, contrast, mood).
- Processing details (Skin, background, liquify – with level specified).
- References (Links to examples of “how to” and “how not to”).
- List of individual edits per file (Table or annotated screenshots).
FAQ: Answers to the Most Common Questions About TS for Retouchers

bur4ik.ru specialists have gathered the questions that most frequently arise when creating a TS and provided expert answers.
1. Should I sort the source files myself before sending them?
Answer: Yes, absolutely. The TS should always specify the exact number of files to be processed. Sending a retoucher a folder with hundreds of unsorted RAW files for them to choose the best ones is unprofessional and can lead to increased costs and work timelines.
2. What should I do if I don’t know which color space to choose?
Answer: If you’re unsure, ask. But by default, the rule is: for online publication and social media, use sRGB. If the photos are intended for high-quality printing, discuss with the printing house whether Adobe RGB or CMYK is required.
3. Can the TS be changed during the work process?
Answer: Changing the TS after the retoucher has started working is called “changing the input data” and usually entails an increase in cost and a shift in deadlines. If changes are necessary, they should be documented in a separate document, and a new price and timeline should be agreed upon.
4. How can I assess if the retoucher has understood my requirements?
Answer: Request processing of one or two test shots (pilot project) according to the full TS. This will allow you to assess how well the retoucher’s vision aligns with yours before they start processing the entire batch.
Interesting Facts About Retouching and TS: Useful Tips from Professionals
The experience of professional photographers and retouchers shows that even the most detailed TS has nuances that can be optimized.
- The Power of a Negative TS: Sometimes it’s easier to state what exactly not to do than to try to describe the ideal result. For example: “Do not over-saturate,” “Do not use Gaussian blur filter for skin.”
- Assessing Complexity: If there are several images in a batch that require complex compositing (e.g., head replacement or removal of a large object), highlight them separately. Do not include them in the standard per-image price.
- Automating File Names: If you work with a large volume, ask the retoucher to save the finished files with a suffix added (e.g.,
_retouch). This will allow you to easily distinguish finished files from originals when uploading to a website or database. - Focus on the Task, Not the Tool: In the TS, you should not specify which particular tool the retoucher should use (e.g., “process using frequency separation”). It is important to specify only the result: “The skin should be clean but with preserved texture.” The retoucher will choose the optimal method themselves.
- Creating a “Retouching Brand Book”: For regular clients or brands that regularly order photo content, it is recommended to create a unified, ongoing “Retouching Brand Book.” This document describes the brand’s color style, retouching intensity, and permissible geometric manipulations, serving as the basis for all future TS.
Creating the ideal TS is an investment. An investment in quality, speed, and, importantly, your peace of mind. Clearly defined requirements ensure that your creative vision is brought to life as accurately and effectively as possible.